


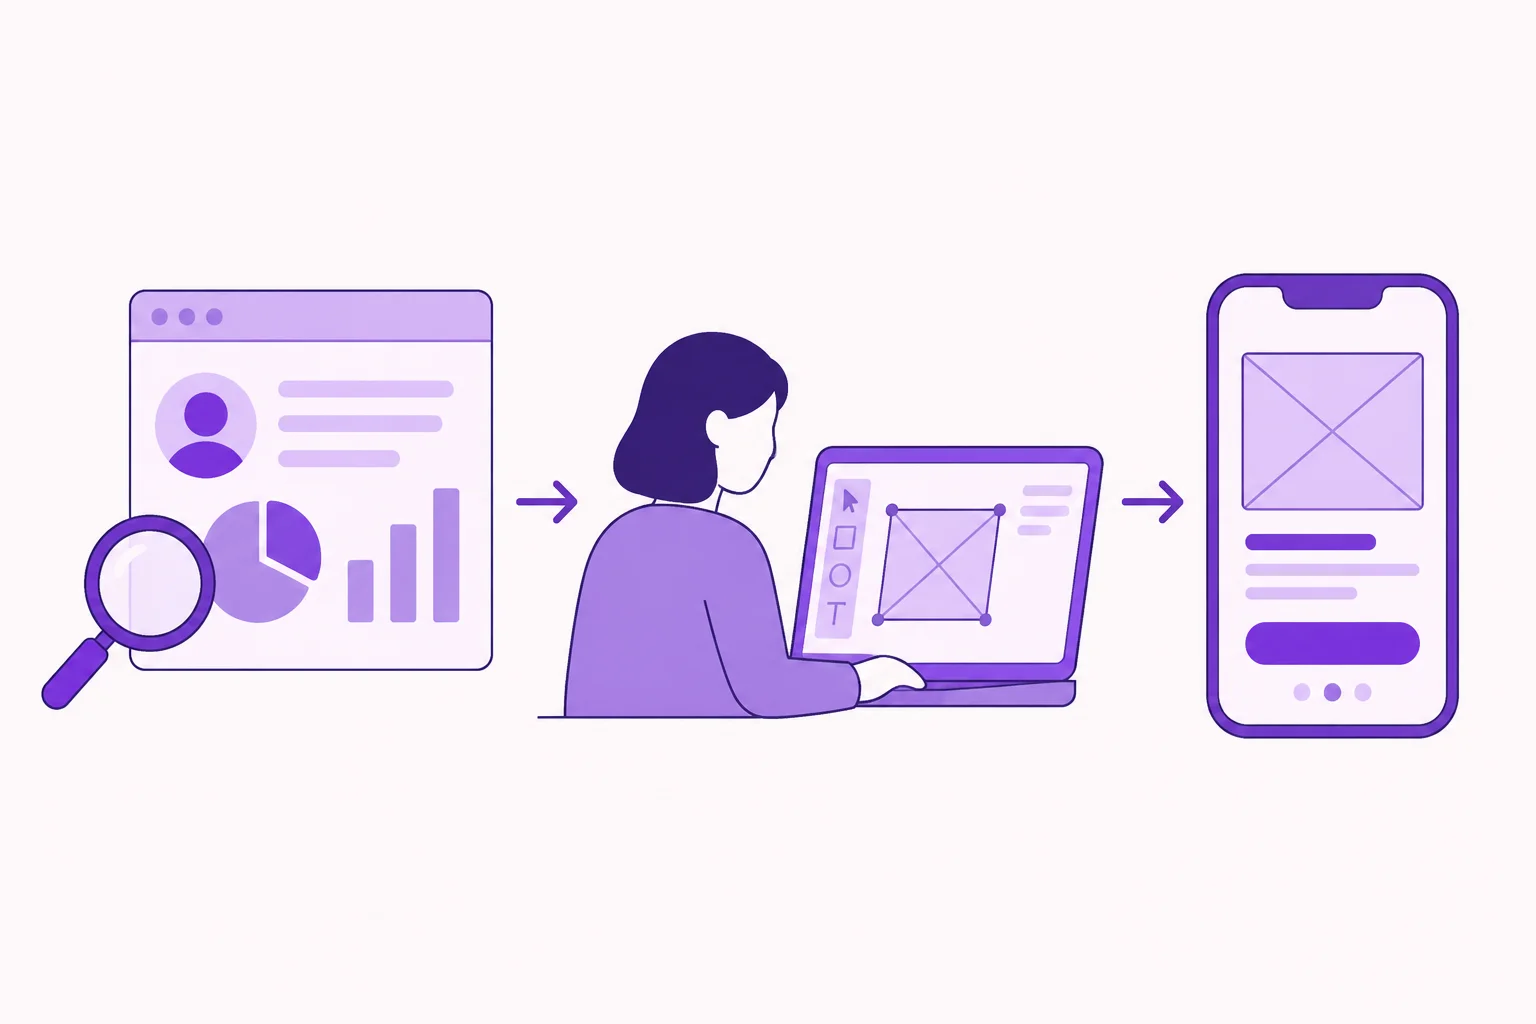
For years, a typical digital product design process looked something like this: research the problem, sketch ideas, create wireframes, design high-fidelity screens, build a prototype, test it with users, iterate, and hand the final design to engineering.
- Product design is a cycle of learning and making: understand the need, explore solutions, test them, and refine what you learn.
- AI changes the cost of experimentation, not the need for evidence: faster prototypes mean more opportunities to test before committing to a solution.
- Use fidelity strategically: visual polish and functional realism are separate choices. Turn each up only when it helps you learn something important.
The product design process has changed, but not in the way you might think
You might expect that AI has rewritten that playbook. It hasn’t at least not the way the headlines about AI replacing designers suggest. The stages are the same, and so is their purpose. What’s changed is how fast and how cheaply a team can move through them. The prototyping stage shows this most clearly.
With the rise of vibe coding – generating working code from natural-language prompts, a prototype is no longer limited to a clickable mockup with no backend. A designer or product manager can now produce a functional, code-backed prototype in an afternoon.
That makes the goal of prototyping clearer than ever: validate that a design works for real users while changes are still cheap, whether the prototype is a set of linked screens or a running build.
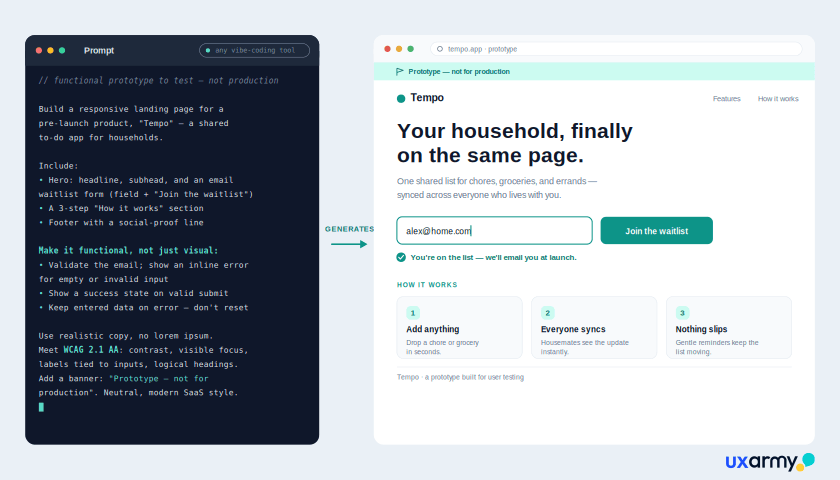
The easiest way to feel this shift is to try it. Paste the prompt below into a vibe-coding tool like Lovable, Bolt, v0, or Claude, and you’ll get a working landing page real signup form, validation, and success and error states in a minute or two.
Try it out for yourself
Build a functional prototype I can test with real users  not production code.

Build a responsive landing page for a pre-launch product called Tempo  a shared to-do app that keeps households (couples, families, housemates) on the same page.

Page structure: a hero with a clear headline, a one-sentence subhead, and an email waitlist form (email field + a "Join the waitlist" button); a 3-step "How it works" section; a footer with a short social-proof line.

Make it functional, not just visual: validate the email and show an inline error for an empty or malformed address ("Enter a valid email address"); show a success state after a valid submit ("You're on the list  we'll email you at launch."); keep entered data on screen if there's an error  don't reset the form.

Use realistic copy, no lorem ipsum. Meet WCAG 2.1 AA basics: sufficient colour contrast, visible keyboard focus states, labels tied to inputs, and a logical heading order. Add a small persistent banner reading "Prototype not for production". Neutral, modern SaaS style, as a single shareable page.💡Pro tip: Swap in your own product and page type, but keep the four functional asks (validation, success, error, don’t-reset) that’s what makes it testable, not just nice to look at.
What is the product design process?
The product design process is an iterative approach to understanding user and business problems, exploring potential solutions, designing and prototyping experiences, testing them with users, and refining the product based on evidence. Most product design processes include some form of discovery, problem definition, ideation, design, prototyping, validation, iteration, and delivery.
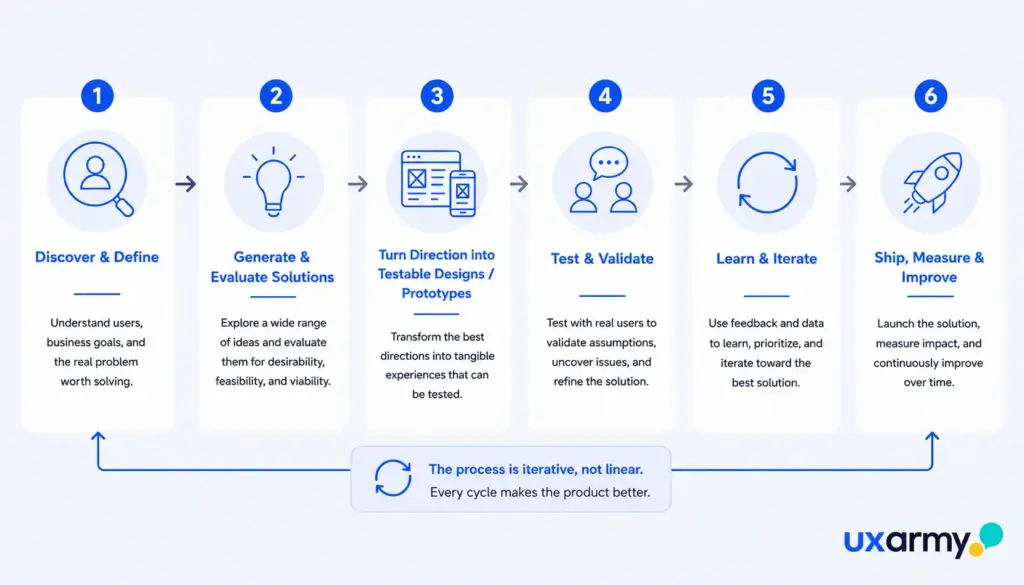
This is not a linear checklist. Teams move backward and forward between stages as new research, technical constraints, business requirements, or user feedback change what they know.
How the product design process works: Step-by-step
The process follows a sequence, but teams frequently loop back when testing reveals something unexpected. Here are the six core steps.
Step 1: Discover & define the problem
Start with the question the product must answer, not the feature you want to build. Spotify’s Discover Weekly began not with “build a playlist feature” but with “how do we help people find music they did not know they would love?” That reframing shaped everything that followed.
The team investigates who the users are, what they are trying to accomplish, how they behave today, where they experience friction, and what the business and technical context looks like. Research may include user interviews, contextual research, surveys, analytics, competitive research, customer or support data, and stakeholder conversations. The goal is not simply to collect research findings, but to turn evidence into a clear understanding of the problem, the people affected by it, the opportunity worth exploring, and the assumptions that still need to be tested.
Research at this stage prevents the most expensive mistake in product design: solving a problem nobody has. A structured research plan and question bank keep this phase focused rather than open-ended.
Step 2: Generate and evaluate solutions
Once the problem is sufficiently understood, the team explores different ways to solve it. Product designers may use sketching, design workshops, user flows, information architecture, wireframes, concept development, competitive inspiration, and increasingly AI-assisted exploration to generate and compare possible directions. The aim is not to produce as many ideas as possible, but to avoid prematurely committing to the first plausible solution and identify the approaches most worth developing further.
Step 3: Turn directions into testable experiences
The selected direction is developed into an experience that people can interact with and evaluate. This may involve creating user flows, wireframes, interaction design, content, visual design, design-system components, accessibility considerations, responsive behaviour, and edge cases.
In 2026, the prototyping step may fork into two approaches:
- The click-through prototype
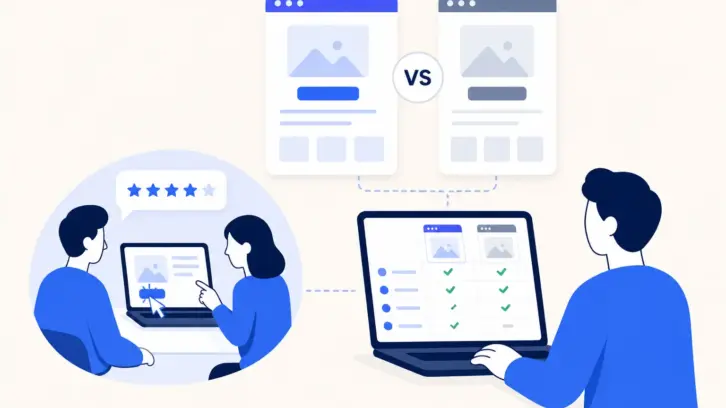
Tools like Figma, Framer or Sketch turn a wireframe into interactive prototypes, something a user can easily navigate. Clicking a button takes you to the next screen. Filling a form shows a confirmation state. The prototype feels like the real product, even though there may be no backend logic. Mapping the full path a design takes from Figma to a tested prototype helps teams see where this step fits into the rest of the workflow. For example, the NN/g team prototyped different versions of their homepage on Figma, testing with real users before committing to development of the winning version. - The vibe-coded prototype
Prompt an AI coding or app-building tool to generate a functional experience with real logic and data. Tools such as Lovable, Bolt, Replit, v0, and Cursor can generate and modify working code from natural-language instructions. Unlike a click-through prototype, the experience can behave like a real application, revealing issues with data, logic, error states, and unexpected inputs. So “vibe-coded prototype” describes how the experience was built, not what these tools are exclusively designed to create.
Which one you reach for depends on the question you need to answer. Here’s how the two prototype types compare with the wireframe they grow out of as a baseline:
| Wireframe | Click-through prototype | Vibe-coded prototype | |
|---|---|---|---|
| What is it | Static structural blueprint | Linked screens, no backend logic | Working code generated from prompts |
| Example tools | Figma, Balsamiq, Whimsical | Figma, Magic Patterns, Framer, Axure | v0, Figma Make, Replit, Lovable, Bolt, Claude design, Cursor, Copilot |
| Best for | Structure & sequence | Flow & comprehension | Real data, logic, edge cases |
| Relative cost | Lowest | Low | Low to moderate |
| Main risk | Too abstract to test | Fakes behaviour it can’t do | False confidence if unhappy paths, error cases are skipped |
Whichever you build, the economic case for prototyping before committing to production is the same:
Fixing a defect discovered after release costs 60 to 100 times more than catching it during design.
Source: IBM Systems Sciences Institute
Step 4: Test & validate with real users
Testing turns assumptions about the experience into evidence. Teams can test concepts, wireframes, interactive prototypes, functional prototypes, or live products depending on what they need to learn.
Test your prototype directly with real users to see where they hesitate, misread a label, or abandon a task. Unmoderated usability testing scales this with broader participant groups across different time zones and languages, while moderated sessions let you probe the reasoning behind a behaviour.
What research methods are commonly used during product development?
A useful way to choose a research method is to start with the question you need to answer rather than choosing a methodology first.
| Question | Useful research |
|---|---|
| Do users have this problem? | Interviews, surveys, contextual research |
| How do users currently solve it? | Interviews, observation, diary studies |
| How common is the problem? | Surveys, analytics |
| Which concept is more appealing? | Concept or preference testing |
| Do users grasp the flow without guidance? | Prototype testing |
| Can users complete the task? | Usability testing |
| Why are users struggling? | Moderated research |
| Did our redesign improve the experience? | Comparative or iterative testing |
| How is the live product performing? | Analytics + usability research |
Testing gives you evidence. Step 5 is where that evidence becomes a product decision
Step 5: Learn & iterate
The purpose of research and testing is not simply to collect feedback. Teams need to interpret the evidence, identify patterns, assess which problems matter, and decide what should change. AI can help accelerate this process by analysing transcripts, responses, task outcomes, and other research data to surface recurring themes, summarise findings, and identify potential patterns for the team to investigate. The researcher or designer still needs to review these findings in context, validate the patterns against the underlying evidence, and decide what they mean for the product.
Small, iterative rounds of usability testing can uncover many important usability problems, especially when each round informs the next design iteration. The eventual outcome of these tests may be a refined design, a new concept, a return to the problem definition, another round of research, or a decision to stop pursuing an idea.
Step 6: Ship, measure & improve
The product design process does not end when designs are handed to engineering or a feature is released. Once the experience is live, product analytics, surveys, customer feedback, support data, usability testing, interviews, and other signals can reveal how people actually use it. These insights feed the next round of discovery and design, turning the product design process into a continuous loop rather than a project with a fixed endpoint.
Because prototyping is where most of the process’s uncertainty gets resolved, it’s worth a closer look at what makes one effective
How AI-assisted prototyping is changing the product design process
AI-assisted prototyping is changing how product teams move through the design process by making it faster and cheaper to turn ideas into something tangible.
Designers can explore more ideas, create functional prototypes faster, and test concepts earlier without waiting for a full engineering cycle. This shifts the product designer’s role from simply producing design artefacts to deciding what is worth building, what needs to be tested, and whether what gets built actually solves the right problem.
AI can help answer: “Can we build this?” Product design still needs to answer: “Should we build this?” and “Does this solve a meaningful problem for the people we are designing for?”
The faster a team can create something, the more important it becomes to distinguish buildability from desirability, usability, accessibility, and product value.
What makes a good digital product prototype?
A good prototype has enough visual and functional fidelity to answer the question you’re trying to answer. Not every prototype needs to look or behave like the finished product. A useful way to think about prototype fidelity is as two separate dials: visual fidelity and functional fidelity.
Visual fidelity controls how closely the prototype resembles the final product from rough sketches and wireframes to polished, production-like interfaces. Functional fidelity controls how closely its behaviour resembles the real experience from simulated clicks to real data, logic, interactions, and edge cases.
The two dials can be turned up independently. A prototype can be visually polished but functionally simple, or visually rough but functionally realistic. Modern AI-assisted coding tools make it easier to move either dial, or both, without necessarily requiring a full engineering cycle.
| Low functional fidelity | High functional fidelity | |
|---|---|---|
| Low visual fidelity | Wireframe Focus on structure & content | Functional prototype Realistic behaviour with minimal visual polish |
| High visual fidelity | High-fidelity prototype Polished interface with simulated behaviour | Production-like prototype Polished interface with realistic behaviour and data |
Turn the dials based on what you need to learn. Testing structure or content hierarchy? Keep both low. Testing whether users can complete a complex flow? Turn up functional fidelity. Evaluating visual hierarchy, interaction details, or brand expression? Turn up visual fidelity. Testing realistic behaviour with real-world data and edge cases? Turn up functional fidelity further.
The goal isn’t maximum fidelity. It’s the right combination of visual and functional fidelity to answer the question that matters most.
The mistake teams make most often is still turning up visual fidelity too early. But functional fidelity has its own pitfall: building a running prototype and mistaking “it works” for “it works for users.”
Where most product design teams get prototyping wrong
Even experienced teams make predictable errors during prototyping.
- Testing only with colleagues instead of real users
Your team already knows how the product works and cannot simulate the confusion of a first-time user. Testing with even five real users reveals the majority of usability problems. - Treating the prototype as a demo, not a test
A demo shows what the product can do; a test reveals what users cannot do. Set tasks, not tours. This gets more tempting with functional prototypes, which are impressive to show off. - Skipping accessibility in prototyping
If your prototype ignores WCAG 2.1 Level AA requirements, your live product will too. Colour contrast, focus states, and screen-reader compatibility are cheaper to build in at the prototype stage than to retrofit later and AI-generated UI code frequently omits them by default, so remember to check. - False confidence from a prototype that runs
A vibe-coded prototype that works can look finished, tempting teams to skip testing entirely “it already works, so why test it?” It works mechanically; that says nothing about whether users understand it. - Showing a prototype without signalling it’s unfinished
A polished prototype can be mistaken for a real product, especially by stakeholders outside the design process. Clearly label it as “Prototype: Not for Production” or “Functionality is simulated”, and note what is real or incomplete. This is especially important for vibe-coded prototypes, which can look production-ready and create false expectations. - Prototype-to-production drift
Because the vibe-coded prototype is real code, it can quietly become the shipped code. It carries untested logic, unreviewed edge cases, and hidden tech debt into production. Decide deliberately what is a throwaway functional prototype and what is the foundation. - Prototyping the happy path only
Users make mistakes, change their minds, and enter unexpected data. Functional prototypes make it easy to test these unhappy paths so there is no longer an excuse to prototype only the ideal flow.
How UXArmy fits into the product design process
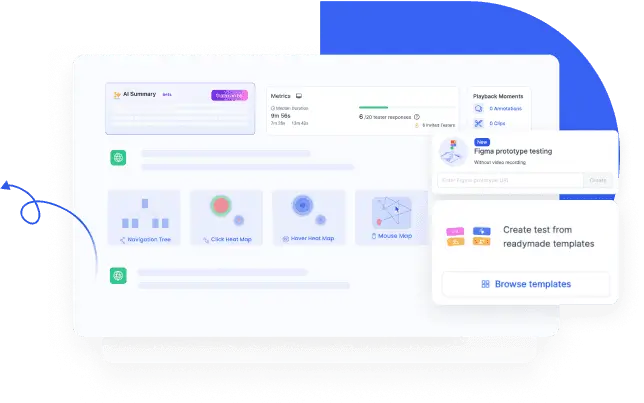
UXArmy supports the Test → Learn → Iterate part of the product design process, whether teams are testing a Figma prototype, a vibe-coded functional prototype, or a live product. Product designers use UXArmy to validate designs at the wireframe, prototype, and live-product stage so that every design review is backed by evidence rather than assumptions.
In practice, a designer links a prototype, sets tasks that mirror real user goals, and receives screen recordings, heatmaps, and task-completion data are available almost as soon as each response is submitted. UXArmy’s research tools integrate directly with Figma and other popular prototyping tools, so testing plugs into the same workflow a design team already uses.
The platform also allows you to bring your own participants or recruit matched participants from a panel spanning more than 20 countries, so testing in local languages is built in rather than bolted on.
Some specific capabilities matter for product designers:
- Concept and preference testing to compare design directions with real users before committing to one.
- Prototype usability testing with heatmaps and path analysis to see exactly where users get stuck.
- Card sorting and tree testing to validate your information architecture confirming people can find and navigate to what they need before you design the screens.
FAQs on Product Design and Prototyping
How many stages are in the product design process?
Depending on the source, the steps may vary. This guide uses a six step version tailored to digital product teams: Discover & Define, Generate & Evaluate Solutions, Turn Directions into Testable Experiences, Test & Validate, Learn & Iterate, and Ship, Measure & Improve.
Design thinking, as taught by the Stanford d.school, describes five stages: empathise, define, ideate, prototype, and test. Broader product development models sometimes list seven, adding business steps such as go-to-market and commercialisation. Teams may move between these steps rather than following them strictly in sequence, using research and feedback to refine the product throughout the process.
What is the difference between wireframing and prototyping?
A wireframe is a static blueprint that defines structure, layout, and content hierarchy. A prototype adds interactivity so a user can click, navigate, and complete tasks. They are sequential: wireframes come first to settle structure, then prototypes bring it to life for testing.
Does vibe coding replace prototyping?
No. Vibe coding changes how a prototype is built generating functional code from prompts instead of linking static screens but the purpose is unchanged: validate a design with real users before committing to it. Vibe coding makes prototypes faster and more realistic; it does not remove the need to test them.
What is the difference between a vibe-coded prototype and an MVP?
A vibe-coded prototype is built to answer a design question and is often meant to be thrown away. An MVP or ‘minimal viable product’ is the real product shipped to users to test a business hypothesis. The risk is letting a prototype silently turn into the MVP without the review, testing, and hardening a real product needs.
What should you do after building your vibe-coded prototype?
Test it with real users before launching it or turning it into production code. A vibe-coded prototype may work technically while still confusing users, creating unexpected errors, or making important tasks difficult to complete. Give users realistic tasks and watch where they hesitate, make mistakes, or get stuck.
UXArmy’s unmoderated testing tool lets you test prototypes, live websites, and mobile apps with real participants, so you can validate the experience before committing to the next stage.
Vibe coding makes it faster to go from an idea to a working experience. Testing tells you whether that experience actually works for the people you’re building it for.
How many users do you need to test a prototype?
Five to eight users per round is enough to surface common usability problems in a qualitative test. Run multiple small rounds rather than one large study, because testing after each design revision catches problems iteratively. If you’d rather not plan and run rounds in-house, UXArmy’s managed ResearchOps service can handle recruitment, testing and analysis for you.
When should you start prototyping in the design process?
As soon as the structure is defined. A low-fidelity prototype can be tested within days of completing wireframes. Starting early means problems surface when they are cheapest to fix the core economic argument for the practice.
Can you test prototypes without writing code?
Yes. For click-through prototypes, tools like Figma, Axure, Framer produce interactive prototypes users can navigate without code. For functional prototypes, vibe-coding tools like v0, Lovable, Claude Design and Bolt generate working code from natural-language prompts so you get real logic and data without writing it yourself. Either kind can be tested with real participants without traditional development work.